Categories
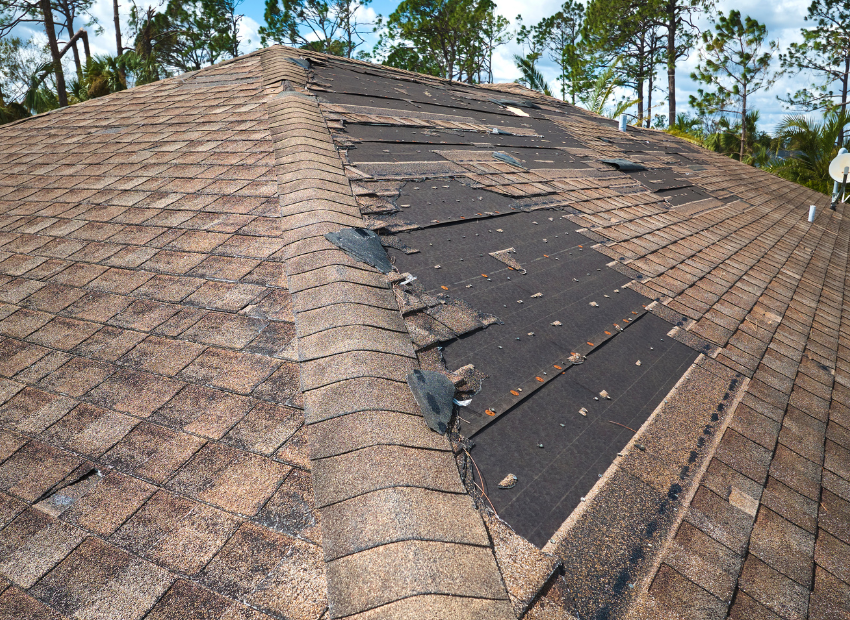
Hail Damage Insurance & Claims Maintenance & Repairs repair vs a full roof replacement Roofing Challenges Storm Damage

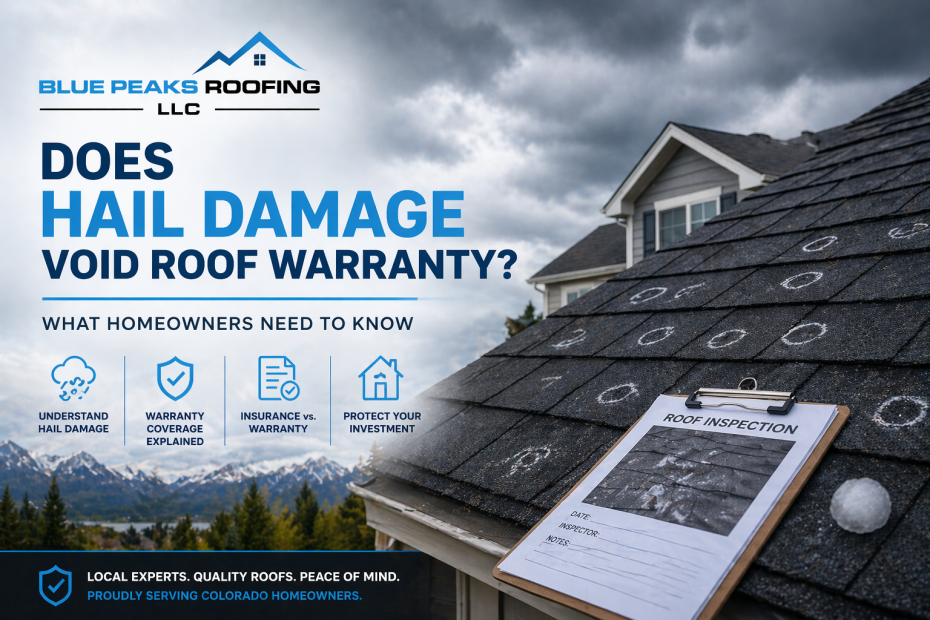
Does Hail Damage Void My Roof Warranty in Colorado?

Every spring in Colorado, we get a version of the same frantic call. A storm just rolled through. Hail the size of golf balls — or in some of Denver’s more dramatic moments, small citrus fruit — just spent 20 minutes beating the neighborhood like a drum. And somewhere between the weather alert on your phone and googling “is my roof ruined,” you land on this question:

Does hail damage void my roof warranty?

The short answer is no. The longer answer is the one that actually saves you money — so keep reading, we promise it’s worth it.

Surprise: You Have Two Warranties. Most People Don’t Know That.

When we replace a roof, you walk away with two separate protections. Almost nobody reads either one. We understand — warranty documents are written by people who attended law school specifically to make sure you don’t understand them. But here’s what you actually need to know:

  1. A manufacturer’s material warranty — covers the shingles themselves if they fail early
  2. A contractor’s workmanship warranty — covers how the roof was installed

Two documents. Two different companies. Two completely different things. Hail touches both — just not the way most people think.

The Manufacturer Warranty: What It Says vs. What You Think It Says

Shingle manufacturers — Atlas, TAMKO, Owens Corning — warranty their products against material defects. Abnormal cracking, premature granule loss, manufacturing failures. The kind of thing that happens because the shingle was a bad shingle — not because Colorado decided to throw frozen precipitation at your house at 70 miles per hour.

Hail is classified as “an act of nature.” It is explicitly excluded from essentially every manufacturer warranty on the market. So no — hail doesn’t void your manufacturer warranty. But it also absolutely will not be covered by it.

“But my shingles are still under warranty!” — Said by approximately 10,000 Colorado homeowners who were about to have a very disappointing phone call with their shingle manufacturer’s customer service line.

Your manufacturer warranty is there if your shingles fail on their own. Your homeowners insurance is there when a storm fails them for you. These are not the same bucket of money. Mixing them up is an expensive mistake that we watch people make every single spring.

The Workmanship Warranty: Here’s the Honest Version

Your workmanship warranty covers how the roof was built — flashing, nail patterns, underlayment, penetration seals. Blue Peaks backs every installation we do with one.

But here’s where we’ll be straight with you, because apparently not every contractor will be: acts of God void workmanship warranties. We cannot warranty a tornado. We cannot warranty a tree falling through your ridge at 2am on a Tuesday. If an extreme weather event physically destroys an installation, that’s not a workmanship failure — that’s nature doing what nature does, and no roofing contractor on earth covers that. Anyone who tells you otherwise is lying to make a sale.

What a workmanship warranty does protect is everything that fails because of how the roof was built — not because of what the sky threw at it. And here’s where it gets interesting: sometimes a storm reveals a workmanship problem that was already quietly sitting there. Improperly sealed flashing, for example. Water finds it during a hard rain and suddenly you’ve got a leak. The storm didn’t create the bad flashing — it just gave it a reason to finally introduce itself. That’s still a workmanship issue. Your contractor is still on the hook for it.

We’ve found that on other companies’ roofs more than once. It’s uncomfortable for everyone involved — except us.

The Real Financial Risk Nobody’s Talking About: Your Deductible

This is the conversation that actually matters. And almost nobody is having it until it’s too late — usually while standing in a driveway staring at a check that’s a lot smaller than expected.

Most Colorado homeowners insurance policies now carry a separate wind and hail deductible. It’s not your standard $1,000 or $2,500 deductible. It’s percentage-based — typically 1 to 2 percent of your dwelling coverage. On a $600,000 home, that’s $6,000 to $12,000 out of your own pocket before your insurance writes dollar one.

The move? Upgrade to a Class IV impact-rated shingle on your next replacement. Many Colorado carriers drop your premium by 20 to 30 percent for Class IV materials. Atlas and TAMKO both make them. We install them constantly. The discount usually pays for the upgrade in a few years — and then just keeps paying you back every single renewal.

A five-minute call that’s worth making:Before your next roof replacement, ask your insurance agent: “If I upgrade to Class IV impact-rated shingles, what happens to my premium?” In Colorado, the answer is almost always good news. Call SCC Insurance at (303) 587-9582 if you want a straight answer from someone who actually knows their stuff.

What To Do After a Hailstorm — In the Right Order

  1. Get a professional inspection before you call your insurance company. Know what’s on your roof before an adjuster tells you what they think they see. Our inspections are free and we document everything with photos. Go in prepared, not reactive.
  2. File your claim promptly. Colorado policies typically give you 1–2 years from the storm date. Hail damage that sat uninspected for 18 months has a funny way of becoming “wear and tear” in the eyes of an insurance company. Don’t let the clock run out on you.
  3. Have your contractor present when the adjuster comes out. You have the right to this. Use it. Adjusters are professionals, but they’ve got five more roofs after yours and they move fast. We’re there to make sure nothing gets left off the list.
  4. Review the scope before you sign anything. Missing line items are common. Missing line items are money. We go through every one before our clients sign a thing.

Bottom Line

Hail doesn’t void your warranty. But a roof that took a beating, went uninspected for a season, and now has moisture quietly working through compromised shingles is going to be a much harder claim to make when you finally get around to it.

We’ve been doing this since 2019. Our team members are licensed insurance adjusters. We know exactly what the insurance company is looking for — because we trained to look for the same things.

If there’s been a storm in your area in the last two years and nobody’s been on that roof, call us. The inspection is free. The conversation is honest. And we’ll tell you straight whether there’s a claim worth making.

Free inspection. No pressure. We know what adjusters look for — because we are adjusters.

(303) 808-0687

Blue Peaks Roofing · Littleton, CO · bluepeaksroofing.com · Mon–Sat 8AM–5PM
About Blue Peaks RoofingBlue Peaks Roofing LLC has been serving the Denver metro since 2019. Our team members are licensed insurance adjusters — we handle the entire claim process from first inspection to final check. BBB A+ rated. 5.0 stars on Google. Littleton, CO.

Categories
Insurance & Claims Maintenance & Repairs Project Planning Roof Repair Roof Replacement Warranty & Insurance

How to File a Roof Insurance Claim in Colorado — Step by Step

Let’s set the scene. A hailstorm just rolled through your neighborhood. Your car has new dimples. Your neighbor is already on the phone with some guy in a pickup truck who appeared out of nowhere handing out business cards like candy. And you’re standing in your driveway wondering what you’re actually supposed to do.

Here’s the thing: your insurance company has navigated this exact process thousands of times. You probably haven’t done it once. That gap in experience is exactly where money disappears — and it’s completely avoidable.

Our team members are licensed insurance adjusters. We know this process from both sides. Here’s exactly how to handle it without leaving money on the table or making expensive mistakes.

First — Pull Out Your Policy and Find These Three Things

Nobody reads their insurance policy. We know. It reads like it was written by someone who hates you. But before you call your carrier, you need to know three things or you’re walking into a conversation completely blind:

  1. Your wind and hail deductible. In Colorado, this is almost always a separate deductible from your standard one — and it’s percentage-based. On a $500,000 home with a 2% hail deductible, you owe $10,000 before insurance pays a single dollar. Find this number before the adjuster does.
  2. RCV or ACV coverage. Replacement Cost Value pays what it costs to build the roof today. Actual Cash Value pays that minus depreciation — meaning they factor in your roof’s age and pay less. The difference is often several thousand dollars. Most people have no idea which one they have until the check arrives.
  3. Your filing deadline. Colorado policies typically require you to file within 1–2 years of the storm date. The clock started the minute the hail hit.

Still confused by your policy? Call SCC Insurance at (303) 587-9582. Free policy review. They’ll translate the fine print into English for you — no strings attached.

Now Here’s the Process, Step by Step

Step 1

Get a Professional Inspection Before You Call Your Insurance Company

This is the step people skip. It’s also the most important one. Before an adjuster puts eyes on your roof, you need to know what’s actually there. At Blue Peaks, inspections are always free and we document everything with photos. Going into the process informed — instead of just waiting to hear what the insurance company says — changes the outcome. Every time.

Step 2

File Your Claim

Call your insurance company or file online. Get a claim number immediately and write it down — you’ll reference it constantly over the next several weeks. Be factual: give them the approximate storm date, describe the damage you’ve observed, and request a full inspection. Don’t speculate, don’t exaggerate. Just tell them what you know.

Step 3

Have Your Contractor Present at the Adjuster Inspection

You have the legal right to have your contractor on site when the insurance adjuster comes out. Use it — every single time. Adjusters are professionals, but they’re also moving fast. They have five more roofs after yours today. Having Blue Peaks on site means every damaged item gets documented before the adjuster closes their laptop, shakes your hand, and drives to their next stop.

Step 4

Review the Scope of Loss Line by Line — Before You Sign Anything

The adjuster produces a Scope of Loss — a line-by-line breakdown of what they’re approving. Commonly missing items: drip edge, ice and water shield, starter strip, pipe boot replacements, ridge ventilation, and overhead and profit. Every missing line is money you’re owed. We go through every single scope before our clients sign anything.

Step 5

Supplement the Claim If It’s Incomplete

If the scope is missing items, your contractor submits a formal supplement to the insurance company with documentation. This is completely normal — it happens on most claims and insurance companies fully expect it. Blue Peaks handles all supplementing on your behalf. You don’t have to fight that battle alone.

Step 6

Receive Your ACV Check and Get Started

Once the scope is agreed upon, your insurance company issues the first check — the Actual Cash Value payment. This is the depreciated value of the roof. Work begins, this payment covers the start of the project, and the clock starts on your completion certificate.

Step 7

Collect Your Recoverable Depreciation After the Roof Is Done

After completion, you submit a certificate of completion and your insurance company releases the recoverable depreciation — the difference between what they paid and what the roof actually costs new. This is your second check. Most of our clients are genuinely surprised by how smooth this last step is once the work is done right.

⚠ Mistakes That Cost Colorado Homeowners Thousands Every Year

  • Signing a contract before you know what your deductible actually is
  • Letting the adjuster inspect your roof without your contractor present
  • Accepting the first scope without reviewing every line item — first scopes are almost never complete
  • Going with the cheapest bid (low bids almost always mean missing scope items — you’ll feel the gap when the final check arrives)
  • Waiting too long after a storm and letting the filing window close
  • Signing contracts with door-to-door contractors who showed up the day after a storm and will be gone by winter — this one deserves its own article
The Blue Peaks difference — and it’s a real one:Every member of our team is a licensed insurance adjuster. We manage the whole process — inspection, documentation, adjuster coordination, supplementing, and final payment collection. Most of our clients pay nothing beyond their deductible. That’s not a pitch. That’s just how this works when you know what you’re doing.

What Does It Actually Cost Me?

In most approved insurance claims: your deductible. That’s it. We work within the approved insurance scope and we never ask homeowners to pay above their approved coverage for covered work. If you have an ACV policy and depreciation isn’t recoverable, we’ll explain exactly what that means before you commit to a single thing. No surprises, ever.

Ready to Get Started?

The insurance company has done this thousands of times. You probably haven’t. That experience gap is where money goes — and it’s completely avoidable when you have the right people in your corner.

If there’s been a storm in your area and nobody’s been on your roof, call us. Free inspection. Honest assessment. No obligation either way. We’ll tell you straight whether there’s a claim worth making.

Free inspection. Licensed adjusters. We know exactly what your insurance company is looking for.

(303) 808-0687

Blue Peaks Roofing · Littleton, CO · bluepeaksroofing.com · Mon–Sat 8AM–5PM

About Blue Peaks RoofingBlue Peaks Roofing LLC has been serving the Denver metro since 2019. Our team members are licensed insurance adjusters — we handle the entire claim process from first inspection to final check. BBB A+ rated. 5.0 stars on Google. Littleton, CO.

Categories
Insurance Roof Repair Roof Replacement Storm Damage

Will Homeowners Insurance Cover Storm Damage to My Roof? Complete Coverage Guide 2025

Question: Will homeowners’ insurance cover roof damage from storms, hail, or wind?

Answer: Yes, homeowners’ insurance typically covers roof damage from sudden weather events like hail, wind, and falling trees—but only if you can prove the damage was caused by a covered peril, not normal wear and tear. Success depends on proper documentation, timing, and understanding your specific policy terms.

What Storm Damage Insurance Actually Covers

Most standard homeowners’ policies cover roof damage from these sudden weather events:

  • Hail damage (any size, but golf ball-sized creates obvious claims)
  • Wind damage from storms with speeds over 50-60 mph
  • Falling trees or branches during storms
  • Ice dam damage from rapid freeze-thaw cycles
  • Lightning strikes that damage roofing materials
  • Tornado or hurricane damage in covered areas

Coverage typically includes: Material replacement, labor costs, temporary repairs, and debris removal. Most policies also cover interior damage caused by roof leaks from covered storm events.

Important caveat: Your roof must have been in good condition before the storm. Insurance adjusters will look for pre-existing issues that could void your claim.

What Insurance Won’t Cover: Critical Exclusions

Understanding exclusions prevents claim denials and costly surprises:

Normal Wear and Tear:

  • Granule loss from aging (typically after 15-20 years)
  • Cracked or curled shingles from sun exposure
  • Gradual leaks are developing over time
  • Moss or algae growth damage

Maintenance-Related Issues:

  • Damage from clogged gutters or poor drainage
  • Problems from missing or inadequate flashing
  • Leaks from unsealed penetrations (vents, chimneys)
  • Structural issues from deferred maintenance

Policy-Specific Exclusions:

  • Cosmetic damage that doesn’t affect function
  • Damage below your deductible amount
  • Secondary damage from uncovered perils
  • Improvements beyond original specifications

How to Document Storm Damage Properly

Proper documentation makes the difference between claim approval and denial:

Immediate Steps (Within 24-48 Hours):

  1. Take photos from ground level of visible damage
  2. Document interior leaks with photos and videos
  3. Note the storm date and time with weather reports
  4. Cover exposed areas with tarps to prevent further damage
  5. Keep receipts for emergency repairs

Detailed Documentation:

  • Photograph damage from multiple angles
  • Include close-ups of specific problem areas
  • Document any debris or impact marks
  • Take “before” photos if available from recent home sales/inspections
  • Record wind speeds and hail size from local weather reports

Professional Documentation: Schedule an inspection within 72 hours of the storm for optimal claim success rates.

The Professional Inspection Process

A qualified roofing contractor’s inspection strengthens your insurance claim significantly:

What Inspectors Look For:

  • Impact marks on shingles, gutters, and vents
  • Granule loss patterns consistent with hail damage
  • Exposed mat or substrate indicating functional damage
  • Structural damage to decking or support systems
  • Secondary damage to flashing, skylights, and penetrations

Inspection Report Should Include:

  • Detailed damage assessment with measurements
  • Professional photos with explanatory notes
  • Estimated repair/replacement costs
  • Recommendations for temporary vs. permanent repairs
  • Timeline for completion

Red Flag: Avoid contractors who offer to “eat your deductible” or guarantee claim approval—this is insurance fraud.

Understanding Your Policy’s Fine Print

Key policy details that affect storm damage coverage:

Replacement Cost vs. Actual Cash Value:

  • Replacement Cost: Pays the full amount to replace with similar materials
  • Actual Cash Value: Pays replacement cost minus depreciation
  • Difference: Varies on a typical roof replacement

Deductible Structure:

  • Standard deductible: Varies
  • Wind/hail deductible: Often 1-5% of the home’s insured value
  • Hurricane deductible: Separate, higher amount in coastal areas

Coverage Limits:

  • Maximum payout amounts for roofing materials
  • Restrictions on upgrade allowances
  • Limits on temporary living expenses during repairs

Timeline Considerations for Storm Damage Claims

Timing significantly impacts claim success:

Critical Deadlines:

  • Report claims within 1 year of storm date (varies by state)
  • Emergency repairs: Must be completed within 30-60 days
  • Final repairs: Typically must begin within 365 days of approval

Optimal Filing Timeline:

  • 0-72 hours: Document damage and contact the insurer
  • 1-7 days: Professional inspection and estimate
  • 7-14 days: File formal claim with all documentation
  • 30-60 days: Adjuster inspection and settlement negotiation

Seasonal Considerations: Claims filed during peak storm season (spring/early summer) may face longer processing times due to volume.

Red Flags That Threaten Your Claim

Avoid these common mistakes that lead to claim denials:

  • Delaying claim filing beyond reasonable timeframes
  • Making major repairs before the adjuster inspection
  • Accepting the first settlement offer without contractor review
  • Using unlicensed contractors for claim-related work
  • Failing to document the pre-storm roof condition
  • Not disclosing previous roof repairs or claims

When to Call Insurance and Roofing Professionals

Contact your insurance company immediately if:

  • Interior leaks develop after storms
  • Neighbors are filing similar claims
  • Local weather reports confirm damaging conditions

Contact roofing professionals for:

  • Emergency tarping and temporary repairs
  • Detailed damage assessments for insurance claims
  • Independent estimates to compare with adjuster assessments
  • Guidance on policy interpretation and claim strategy

Bottom Line: Your Claim Success Strategy

File a claim if:

  • Storm damage is visible and functional (not just cosmetic)
  • Estimated repairs exceed your deductible
  • You can document the specific storm event
  • Your roof was in good condition pre-storm

Don’t file a claim if:

  • Damage is clearly from normal wear and tear
  • Repair costs are close to or below your deductible
  • You’ve filed multiple recent claims (rate impact risk)
  • Damage is purely cosmetic with no functional impact

Your Next Steps for Storm Damage Claims

  1. Review your current policy to understand coverage limits and deductibles
  2. Document your roof’s current condition with photos for future reference
  3. Create a storm response plan with contact information for trusted contractors
  4. After any storm: Inspect immediately and document any visible damage
  5. Contact both your insurer and a qualified contractor within 72 hours of suspected damage
  6. Keep detailed records of all communications and expenses throughout the process

Success with insurance claims requires prompt action, proper documentation, and professional guidance to navigate the complex process effectively.

Categories
Homeowners Windows & Siding

When to Replace Windows During a Reroof: A Homeowner’s Guide

Why Roof and Window Replacement Should Be Coordinated

Most homeowners view roof replacement and window replacement as separate, isolated projects. They hire a roofer one year and a window company the next. This fragmented approach often leads to higher costs, missed opportunities for efficiency, and—most critically—vulnerable points in your home’s water defense.

The Building Envelope: How Roofs and Windows Work Together

Your home isn’t a collection of parts; it’s a system. The “building envelope” is the barrier that separates the conditioned interior from the harsh exterior. Roofs and windows are the two largest openings in this envelope. Where they meet—at dormers, skylights, and upper-story walls—is where leaks are most likely to occur.

Flashing Integration & Water Management

The critical intersection is flashing. Flashing is the metal material used to direct water away from joints.

  • Dormers: Windows located in dormers often have step flashing that integrates directly behind the siding and under the shingles. Replacing the roof allows us to replace this flashing. If you replace windows later, the window installer might disturb this seal.
  • Skylights: These are essentially “windows on the roof.” They must be curbed and flashed into the roofing system perfectly. Replacing a roof is the only reliable time to replace aging skylights.

Sequencing Benefits: Roof First or Windows First?

If you can’t do them simultaneously, the general rule is Roof First. Why? Roofing is a messy, heavy-construction process. Debris falls. Dust settles. Doing the roof first prevents damage to brand-new windows. However, doing them together allows the flashing to be integrated seamlessly in one operation.

Labor Efficiencies & Cost Savings

Combining projects creates economies of scale:

  • One Setup: Dumpsters, scaffolding, and safety gear are set up once.
  • Reduced Trip Charges: Crews are already on site.
  • Bulk Material Orders: Potential savings on delivery fees.
  • Siding Labor: Often, siding near windows needs to be manipulated to install flashing. Doing this once saves labor hours.

Colorado Weather Considerations

In Colorado, our freeze-thaw cycles are brutal on sealants. Caulk shrinks and cracks. By replacing windows and roofs together, we install fresh, high-grade sealants and proper head flashing (drip caps) that protect the window frame from melting snow dripping off the roof eave.

When NOT to Replace Windows During a Reroof

There are exceptions. If your budget is tight and the roof is leaking, prioritize the roof. A leaking roof destroys structure; drafty windows just cost energy. Don’t delay a critical roof repair to save up for windows.

Planning Your Exterior Upgrade Timeline

If you are planning a major exterior overhaul, consult with a contractor who understands the full envelope. At Blue Peaks, we manage both trades, ensuring the roofer and the window installer communicate about flashing details before a single nail is pulled.

Categories
Maintenance & Repairs repair vs a full roof replacement Roof Repair Roof Replacement Roofing Challenges

Roof Repair vs. Replacement: How to Make the Right Decision

Question: How do I tell whether I need a repair vs a full roof replacement?

Answer: This decision can save or cost you thousands of dollars. The key is evaluating six critical factors: roof age, damage extent, structural condition, cost comparison, and your long-term plans.

1. Check Your Roof’s Age First

Age is your starting point for this decision:

  • Asphalt shingles: 20-25 years
  • Metal roofing: 40-70 years
  • Tile roofing: 50+ years
  • Wood shingles: 25-30 years

If your asphalt roof is over 20 years old with multiple issues, replacement usually makes more financial sense than repeated repairs.

2. Apply the “One-Third Rule”

Professional roofers use this guideline: if more than one-third of your roof shows damage, replacement is typically more cost-effective.

Repair makes sense when:

  • Damage affects less than 10-15% of the roof
  • Missing or damaged shingles are in isolated areas
  • You have minor flashing issues around chimneys or vents
  • Leaks are small and localized

Replacement is better when:

  • Widespread shingle damage across multiple sections
  • Multiple leaks in different areas
  • Extensive granule loss creates bare spots
  • Curling, cracking, or buckling shingles throughout

3. Look for Structural Warning Signs

Some issues almost always require full replacement:

  • Sagging areas: Indicates damage to the roof deck or support beams
  • Daylight visible through roof boards (check your attic)
  • Water stains or mold in the attic
  • Soft, spongy areas when walking on the roof

These structural problems can’t be fixed with simple repairs.

4. Do the Financial Math

Choose repair when:

  • Total repair costs are less than 25% of the replacement cost
  • The roof is under 15 years old
  • Damage is localized with sound underlying the structure
  • You’re selling within 2-3 years

Choose replacement when:

  • Repair costs exceed 30% of the replacement cost
  • You’ve needed multiple repairs recently
  • You plan to stay in the home long-term
  • Energy efficiency improvements would provide significant savings

5. Red Flags That Almost Always Mean Replacement

Call for replacement quotes if you see:

  • Roof is over 25 years old with multiple problems
  • Roof deck visible through missing shingles
  • Heavy granule accumulation in gutters
  • Multiple shingle layers (building codes typically allow a maximum of two)
  • Widespread moss or algae growth
  • Significantly higher energy bills due to poor insulation

6. Consider Your Climate

Harsh weather conditions accelerate roof deterioration:

  • Recent severe storms (hail, wind, snow loads)
  • Extreme temperature swings
  • High UV exposure
  • Areas prone to ice dams

These factors often tip the scale toward replacement, especially for older roofs.

7. Factor in Modern Benefits

New roofs offer advantages older ones lack:

  • Better insulation reduces energy costs
  • Impact-resistant materials that may lower insurance premiums
  • Improved water resistance and weather protection
  • Longer manufacturer warranties

Making Your Decision: Step-by-Step Process

  1. Start with age: If approaching expected lifespan, lean toward replacement
  2. Assess damage extent: Use the one-third rule
  3. Check for structural issues: These typically require replacement
  4. Calculate costs: Compare repair vs. replacement expenses
  5. Consider timeline: How long will you stay in the home?
  6. Get professional opinions: Consult 2-3 reputable contractors

When to Call a Professional

Schedule a professional assessment when:

  • You’re unsure about the extent
  • You need insurance claim documentation
  • Safety prevents proper self-inspection
  • You want a detailed cost-benefit analysis

Climate-Specific Considerations

In areas with harsh weather like Denver (hail, snow, temperature swings), roofs deteriorate faster. Factor in:

  • Recent storm damage
  • Frequency of severe weather
  • Local building code requirements
  • Insurance considerations for impact-resistant materials

The Bottom Line

Repair when damage is localized, the roof is relatively young, and costs are reasonable compared to replacement.

Replace when the roof is old, damage is widespread, you have structural issues, or you’re spending more than 30% of the replacement cost on repairs.

Remember: your roof protects your home’s value and your family’s safety. While replacement costs more upfront, it often provides better long-term value than repeated repairs on an aging roof.

Next step: Get estimates from licensed contractors for both repair and replacement options. This gives you the concrete numbers needed to make an informed decision based on your specific situation and budget.

Categories
Maintenance & Repairs Metal Roofing Project Planning Roofing Challenges Windows & Siding

Best Roofing Materials for Denver’s Extreme Weather

Question: What kinds of roofing materials perform best in Denver’s weather, especially against hail, UV, snow, etc.?

Answer: For Denver’s challenging climate, impact-resistant Class 4 shingles, metal roofing, and high-quality synthetic materials perform best against hail, UV damage, and freeze-thaw cycles. The key is combining durable materials with proper underlayment and ventilation systems.

Understanding Denver’s Unique Roofing Challenges

Denver sits in “Hail Alley,” experiencing some of the most severe weather conditions in the country. Your roof must withstand:

  • Frequent hailstorms with stones up to golf ball size
  • Intense UV radiation at 5,280+ feet elevation
  • Heavy snow loads up to 30 pounds per square foot
  • Extreme freeze-thaw cycles that can crack materials
  • High winds exceeding 100 mph during storms

These conditions eliminate many standard roofing options and demand materials specifically engineered for extreme weather.

Impact-Resistant Shingles: Your First Line of Defense

Class 4 impact-resistant shingles represent the gold standard for Denver homes:

Performance Benefits:

  • Pass UL 2218 tests with 2-inch steel ball impacts
  • Reduce hail damage by up to 90% compared to standard shingles
  • Often qualify for 10-30% insurance discounts
  • Maintain granule adhesion better under UV exposure

Top-Performing Brands:

  • GAF Timberline HD-Z (Lifetime warranty)
  • Owens Corning Duration Storm (130 mph wind rating)
  • CertainTeed NorthGate Class 4 (Algae resistance included)

Cost Consideration: Expect 15-20% higher upfront costs, but insurance savings and longevity typically offset this within 3-5 years.

Metal Roofing: Maximum Durability for Severe Weather

Metal roofing excels in Denver’s climate with superior performance metrics:

Hail Resistance:

  • Aluminum and steel deflect impacts without cracking
  • Standing seam systems eliminate weak points
  • Minimal maintenance is required after hail events

Snow and Ice Management:

  • Smooth surfaces encourage snow shedding
  • Reduces ice dam formation by 85%
  • Handles snow loads up to 50 pounds per square foot

UV Protection:

  • Reflective coatings reduce heat absorption by 40%
  • Maintains color integrity for 30+ years
  • Energy savings of 15-25% during the cooling season

Material Options: Steel (most economical), aluminum (lightweight), copper (premium longevity).

Traditional vs. Synthetic Material Performance

Asphalt Shingles (Standard):

  • Pros: Lowest upfront cost
  • Cons: 15-20 year lifespan in Denver, vulnerable to hail
  • Verdict: Only suitable for budget-conscious temporary solutions

Concrete/Clay Tile:

  • Pros: 50+ year lifespan, excellent UV resistance
  • Cons: Heavy (9-12 lbs/sq ft), can crack from hail impact
  • Best Use: Mediterranean-style homes with proper structural support

Synthetic Materials:

  • Polymer shingles mimic slate/wood appearance
  • Superior impact resistance compared to natural materials
  • 30-50 year warranties standard
  • 20-30% more expensive than standard shingles

Critical Installation Factors for Denver Success

Beyond material selection, proper installation determines long-term performance:

Underlayment Requirements:

  • Ice and water shield on entire roof (not just eaves)
  • Minimum 30-pound felt, preferably synthetic
  • Proper overlap and sealing at all penetrations

Ventilation Systems:

  • Ridge and soffit ventilation prevent ice dams
  • Target 1 square foot of ventilation per 150 square feet of attic space
  • Balanced intake/exhaust prevents moisture buildup

Fastening Standards:

  • 6-nail minimum per shingle (8 nails in high-wind zones)
  • Ring-shank or screw nails prevent withdrawal
  • Proper spacing prevents thermal expansion issues

Red Flags: When Materials Won’t Work

Avoid these material choices in Denver:

  • Wood shakes without fire-retardant treatment
  • Shingles rated below 110 mph wind resistance
  • Architectural shingles without impact ratings
  • Single-layer roofing systems on low-slope areas
  • Materials without UV-resistant granules

Warning Signs of Poor Installation:

  • Exposed nail heads or incorrect nail placement
  • Missing or inadequate flashing
  • Insufficient ventilation openings
  • Underlayment gaps or poor sealing

When to Call Professional Roofers

Contact licensed professionals for:

  • Material selection consultation based on your specific microclimate
  • Structural assessment for heavier materials like tile or metal
  • Insurance claim assistance after hail damage
  • Installation of impact-resistant systems (requires specialized techniques)
  • Annual inspections to catch problems before they worsen

Bottom Line: Your Decision Framework

Choose Class 4 Impact-Resistant Shingles if:

  • Budget is moderate
  • You want insurance discounts
  • The home has a standard structural capacity

Choose Metal Roofing if:

  • Long-term investment is a priority
  • You want maximum hail/wind protection
  • Energy efficiency is important

Choose Synthetic Materials if:

  • You want a specific aesthetic (slate/wood look)
  • Maximum longevity is desired
  • Budget allows premium pricing

Your Next Steps

  1. Get a professional assessment of your home’s structural capacity
  2. Contact your insurance agent about impact-resistant discounts
  3. Request quotes from 3+ licensed contractors with Denver experience
  4. Verify material certifications meet Colorado building codes
  5. Schedule installation during optimal weather windows (late spring/early fall)

The investment in proper materials and installation pays dividends through reduced maintenance, insurance savings, and protection of your home’s value in Denver’s challenging climate