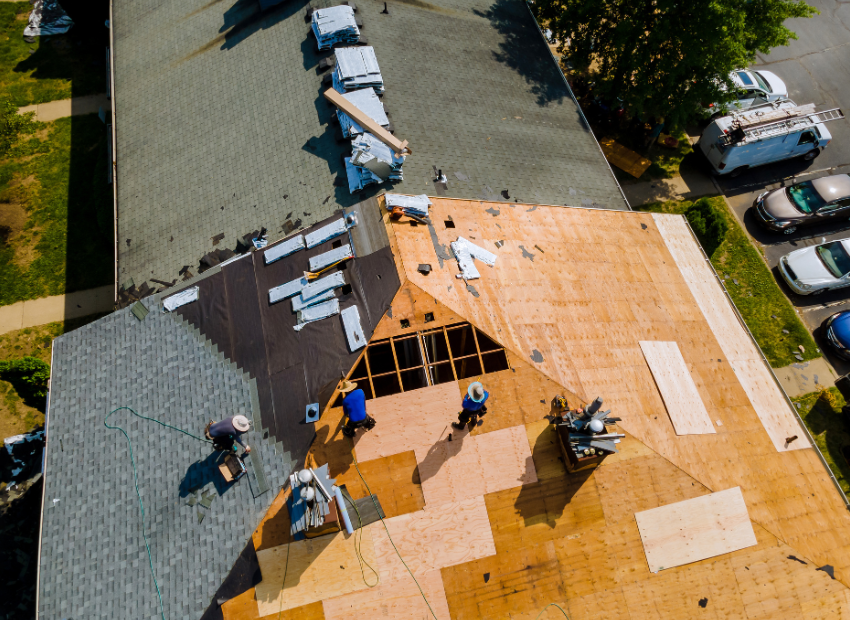

Categories
Insurance & Claims Maintenance & Repairs Project Planning Roof Repair Roof Replacement Warranty & Insurance

How to File a Roof Insurance Claim in Colorado — Step by Step

Let’s set the scene. A hailstorm just rolled through your neighborhood. Your car has new dimples. Your neighbor is already on the phone with some guy in a pickup truck who appeared out of nowhere handing out business cards like candy. And you’re standing in your driveway wondering what you’re actually supposed to do.

Here’s the thing: your insurance company has navigated this exact process thousands of times. You probably haven’t done it once. That gap in experience is exactly where money disappears — and it’s completely avoidable.

Our team members are licensed insurance adjusters. We know this process from both sides. Here’s exactly how to handle it without leaving money on the table or making expensive mistakes.

First — Pull Out Your Policy and Find These Three Things

Nobody reads their insurance policy. We know. It reads like it was written by someone who hates you. But before you call your carrier, you need to know three things or you’re walking into a conversation completely blind:

  1. Your wind and hail deductible. In Colorado, this is almost always a separate deductible from your standard one — and it’s percentage-based. On a $500,000 home with a 2% hail deductible, you owe $10,000 before insurance pays a single dollar. Find this number before the adjuster does.
  2. RCV or ACV coverage. Replacement Cost Value pays what it costs to build the roof today. Actual Cash Value pays that minus depreciation — meaning they factor in your roof’s age and pay less. The difference is often several thousand dollars. Most people have no idea which one they have until the check arrives.
  3. Your filing deadline. Colorado policies typically require you to file within 1–2 years of the storm date. The clock started the minute the hail hit.

Still confused by your policy? Call SCC Insurance at (303) 587-9582. Free policy review. They’ll translate the fine print into English for you — no strings attached.

Now Here’s the Process, Step by Step

Step 1

Get a Professional Inspection Before You Call Your Insurance Company

This is the step people skip. It’s also the most important one. Before an adjuster puts eyes on your roof, you need to know what’s actually there. At Blue Peaks, inspections are always free and we document everything with photos. Going into the process informed — instead of just waiting to hear what the insurance company says — changes the outcome. Every time.

Step 2

File Your Claim

Call your insurance company or file online. Get a claim number immediately and write it down — you’ll reference it constantly over the next several weeks. Be factual: give them the approximate storm date, describe the damage you’ve observed, and request a full inspection. Don’t speculate, don’t exaggerate. Just tell them what you know.

Step 3

Have Your Contractor Present at the Adjuster Inspection

You have the legal right to have your contractor on site when the insurance adjuster comes out. Use it — every single time. Adjusters are professionals, but they’re also moving fast. They have five more roofs after yours today. Having Blue Peaks on site means every damaged item gets documented before the adjuster closes their laptop, shakes your hand, and drives to their next stop.

Step 4

Review the Scope of Loss Line by Line — Before You Sign Anything

The adjuster produces a Scope of Loss — a line-by-line breakdown of what they’re approving. Commonly missing items: drip edge, ice and water shield, starter strip, pipe boot replacements, ridge ventilation, and overhead and profit. Every missing line is money you’re owed. We go through every single scope before our clients sign anything.

Step 5

Supplement the Claim If It’s Incomplete

If the scope is missing items, your contractor submits a formal supplement to the insurance company with documentation. This is completely normal — it happens on most claims and insurance companies fully expect it. Blue Peaks handles all supplementing on your behalf. You don’t have to fight that battle alone.

Step 6

Receive Your ACV Check and Get Started

Once the scope is agreed upon, your insurance company issues the first check — the Actual Cash Value payment. This is the depreciated value of the roof. Work begins, this payment covers the start of the project, and the clock starts on your completion certificate.

Step 7

Collect Your Recoverable Depreciation After the Roof Is Done

After completion, you submit a certificate of completion and your insurance company releases the recoverable depreciation — the difference between what they paid and what the roof actually costs new. This is your second check. Most of our clients are genuinely surprised by how smooth this last step is once the work is done right.

⚠ Mistakes That Cost Colorado Homeowners Thousands Every Year

  • Signing a contract before you know what your deductible actually is
  • Letting the adjuster inspect your roof without your contractor present
  • Accepting the first scope without reviewing every line item — first scopes are almost never complete
  • Going with the cheapest bid (low bids almost always mean missing scope items — you’ll feel the gap when the final check arrives)
  • Waiting too long after a storm and letting the filing window close
  • Signing contracts with door-to-door contractors who showed up the day after a storm and will be gone by winter — this one deserves its own article
The Blue Peaks difference — and it’s a real one:Every member of our team is a licensed insurance adjuster. We manage the whole process — inspection, documentation, adjuster coordination, supplementing, and final payment collection. Most of our clients pay nothing beyond their deductible. That’s not a pitch. That’s just how this works when you know what you’re doing.

What Does It Actually Cost Me?

In most approved insurance claims: your deductible. That’s it. We work within the approved insurance scope and we never ask homeowners to pay above their approved coverage for covered work. If you have an ACV policy and depreciation isn’t recoverable, we’ll explain exactly what that means before you commit to a single thing. No surprises, ever.

Ready to Get Started?

The insurance company has done this thousands of times. You probably haven’t. That experience gap is where money goes — and it’s completely avoidable when you have the right people in your corner.

If there’s been a storm in your area and nobody’s been on your roof, call us. Free inspection. Honest assessment. No obligation either way. We’ll tell you straight whether there’s a claim worth making.

Free inspection. Licensed adjusters. We know exactly what your insurance company is looking for.

(303) 808-0687

Blue Peaks Roofing · Littleton, CO · bluepeaksroofing.com · Mon–Sat 8AM–5PM
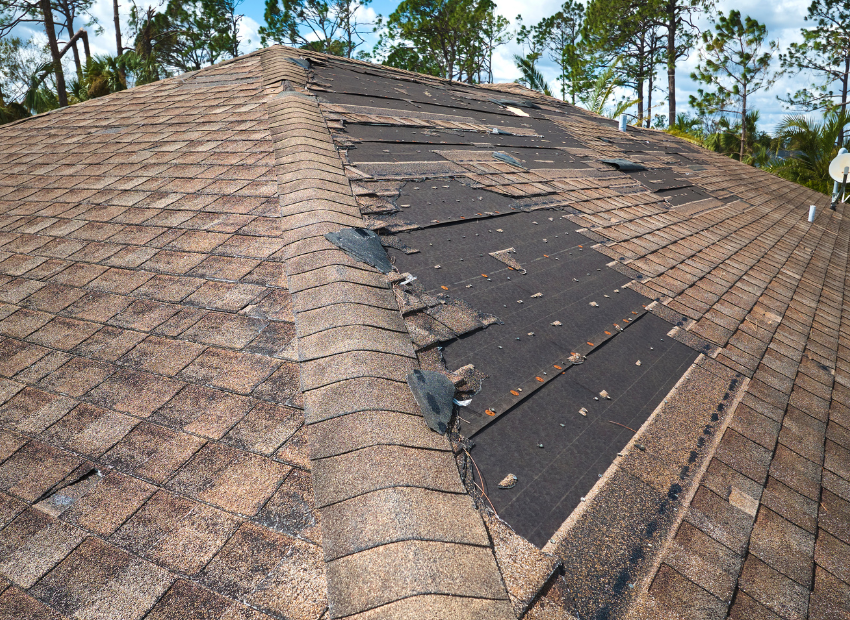
About Blue Peaks RoofingBlue Peaks Roofing LLC has been serving the Denver metro since 2019. Our team members are licensed insurance adjusters — we handle the entire claim process from first inspection to final check. BBB A+ rated. 5.0 stars on Google. Littleton, CO.

Categories
Insurance Roof Repair Roof Replacement Storm Damage

Will Homeowners Insurance Cover Storm Damage to My Roof? Complete Coverage Guide 2025

Question: Will homeowners’ insurance cover roof damage from storms, hail, or wind?

Answer: Yes, homeowners’ insurance typically covers roof damage from sudden weather events like hail, wind, and falling trees—but only if you can prove the damage was caused by a covered peril, not normal wear and tear. Success depends on proper documentation, timing, and understanding your specific policy terms.

What Storm Damage Insurance Actually Covers

Most standard homeowners’ policies cover roof damage from these sudden weather events:

  • Hail damage (any size, but golf ball-sized creates obvious claims)
  • Wind damage from storms with speeds over 50-60 mph
  • Falling trees or branches during storms
  • Ice dam damage from rapid freeze-thaw cycles
  • Lightning strikes that damage roofing materials
  • Tornado or hurricane damage in covered areas

Coverage typically includes: Material replacement, labor costs, temporary repairs, and debris removal. Most policies also cover interior damage caused by roof leaks from covered storm events.

Important caveat: Your roof must have been in good condition before the storm. Insurance adjusters will look for pre-existing issues that could void your claim.

What Insurance Won’t Cover: Critical Exclusions

Understanding exclusions prevents claim denials and costly surprises:

Normal Wear and Tear:

  • Granule loss from aging (typically after 15-20 years)
  • Cracked or curled shingles from sun exposure
  • Gradual leaks are developing over time
  • Moss or algae growth damage

Maintenance-Related Issues:

  • Damage from clogged gutters or poor drainage
  • Problems from missing or inadequate flashing
  • Leaks from unsealed penetrations (vents, chimneys)
  • Structural issues from deferred maintenance

Policy-Specific Exclusions:

  • Cosmetic damage that doesn’t affect function
  • Damage below your deductible amount
  • Secondary damage from uncovered perils
  • Improvements beyond original specifications

How to Document Storm Damage Properly

Proper documentation makes the difference between claim approval and denial:

Immediate Steps (Within 24-48 Hours):

  1. Take photos from ground level of visible damage
  2. Document interior leaks with photos and videos
  3. Note the storm date and time with weather reports
  4. Cover exposed areas with tarps to prevent further damage
  5. Keep receipts for emergency repairs

Detailed Documentation:

  • Photograph damage from multiple angles
  • Include close-ups of specific problem areas
  • Document any debris or impact marks
  • Take “before” photos if available from recent home sales/inspections
  • Record wind speeds and hail size from local weather reports

Professional Documentation: Schedule an inspection within 72 hours of the storm for optimal claim success rates.

The Professional Inspection Process

A qualified roofing contractor’s inspection strengthens your insurance claim significantly:

What Inspectors Look For:

  • Impact marks on shingles, gutters, and vents
  • Granule loss patterns consistent with hail damage
  • Exposed mat or substrate indicating functional damage
  • Structural damage to decking or support systems
  • Secondary damage to flashing, skylights, and penetrations

Inspection Report Should Include:

  • Detailed damage assessment with measurements
  • Professional photos with explanatory notes
  • Estimated repair/replacement costs
  • Recommendations for temporary vs. permanent repairs
  • Timeline for completion

Red Flag: Avoid contractors who offer to “eat your deductible” or guarantee claim approval—this is insurance fraud.

Understanding Your Policy’s Fine Print

Key policy details that affect storm damage coverage:

Replacement Cost vs. Actual Cash Value:

  • Replacement Cost: Pays the full amount to replace with similar materials
  • Actual Cash Value: Pays replacement cost minus depreciation
  • Difference: Varies on a typical roof replacement

Deductible Structure:

  • Standard deductible: Varies
  • Wind/hail deductible: Often 1-5% of the home’s insured value
  • Hurricane deductible: Separate, higher amount in coastal areas

Coverage Limits:

  • Maximum payout amounts for roofing materials
  • Restrictions on upgrade allowances
  • Limits on temporary living expenses during repairs

Timeline Considerations for Storm Damage Claims

Timing significantly impacts claim success:

Critical Deadlines:

  • Report claims within 1 year of storm date (varies by state)
  • Emergency repairs: Must be completed within 30-60 days
  • Final repairs: Typically must begin within 365 days of approval

Optimal Filing Timeline:

  • 0-72 hours: Document damage and contact the insurer
  • 1-7 days: Professional inspection and estimate
  • 7-14 days: File formal claim with all documentation
  • 30-60 days: Adjuster inspection and settlement negotiation

Seasonal Considerations: Claims filed during peak storm season (spring/early summer) may face longer processing times due to volume.

Red Flags That Threaten Your Claim

Avoid these common mistakes that lead to claim denials:

  • Delaying claim filing beyond reasonable timeframes
  • Making major repairs before the adjuster inspection
  • Accepting the first settlement offer without contractor review
  • Using unlicensed contractors for claim-related work
  • Failing to document the pre-storm roof condition
  • Not disclosing previous roof repairs or claims

When to Call Insurance and Roofing Professionals

Contact your insurance company immediately if:

  • Interior leaks develop after storms
  • Neighbors are filing similar claims
  • Local weather reports confirm damaging conditions

Contact roofing professionals for:

  • Emergency tarping and temporary repairs
  • Detailed damage assessments for insurance claims
  • Independent estimates to compare with adjuster assessments
  • Guidance on policy interpretation and claim strategy

Bottom Line: Your Claim Success Strategy

File a claim if:

  • Storm damage is visible and functional (not just cosmetic)
  • Estimated repairs exceed your deductible
  • You can document the specific storm event
  • Your roof was in good condition pre-storm

Don’t file a claim if:

  • Damage is clearly from normal wear and tear
  • Repair costs are close to or below your deductible
  • You’ve filed multiple recent claims (rate impact risk)
  • Damage is purely cosmetic with no functional impact

Your Next Steps for Storm Damage Claims

  1. Review your current policy to understand coverage limits and deductibles
  2. Document your roof’s current condition with photos for future reference
  3. Create a storm response plan with contact information for trusted contractors
  4. After any storm: Inspect immediately and document any visible damage
  5. Contact both your insurer and a qualified contractor within 72 hours of suspected damage
  6. Keep detailed records of all communications and expenses throughout the process

Success with insurance claims requires prompt action, proper documentation, and professional guidance to navigate the complex process effectively.

Categories
Maintenance & Repairs repair vs a full roof replacement Roof Repair Roof Replacement Roofing Challenges

Roof Repair vs. Replacement: How to Make the Right Decision

Question: How do I tell whether I need a repair vs a full roof replacement?

Answer: This decision can save or cost you thousands of dollars. The key is evaluating six critical factors: roof age, damage extent, structural condition, cost comparison, and your long-term plans.

1. Check Your Roof’s Age First

Age is your starting point for this decision:

  • Asphalt shingles: 20-25 years
  • Metal roofing: 40-70 years
  • Tile roofing: 50+ years
  • Wood shingles: 25-30 years

If your asphalt roof is over 20 years old with multiple issues, replacement usually makes more financial sense than repeated repairs.

2. Apply the “One-Third Rule”

Professional roofers use this guideline: if more than one-third of your roof shows damage, replacement is typically more cost-effective.

Repair makes sense when:

  • Damage affects less than 10-15% of the roof
  • Missing or damaged shingles are in isolated areas
  • You have minor flashing issues around chimneys or vents
  • Leaks are small and localized

Replacement is better when:

  • Widespread shingle damage across multiple sections
  • Multiple leaks in different areas
  • Extensive granule loss creates bare spots
  • Curling, cracking, or buckling shingles throughout

3. Look for Structural Warning Signs

Some issues almost always require full replacement:

  • Sagging areas: Indicates damage to the roof deck or support beams
  • Daylight visible through roof boards (check your attic)
  • Water stains or mold in the attic
  • Soft, spongy areas when walking on the roof

These structural problems can’t be fixed with simple repairs.

4. Do the Financial Math

Choose repair when:

  • Total repair costs are less than 25% of the replacement cost
  • The roof is under 15 years old
  • Damage is localized with sound underlying the structure
  • You’re selling within 2-3 years

Choose replacement when:

  • Repair costs exceed 30% of the replacement cost
  • You’ve needed multiple repairs recently
  • You plan to stay in the home long-term
  • Energy efficiency improvements would provide significant savings

5. Red Flags That Almost Always Mean Replacement

Call for replacement quotes if you see:

  • Roof is over 25 years old with multiple problems
  • Roof deck visible through missing shingles
  • Heavy granule accumulation in gutters
  • Multiple shingle layers (building codes typically allow a maximum of two)
  • Widespread moss or algae growth
  • Significantly higher energy bills due to poor insulation

6. Consider Your Climate

Harsh weather conditions accelerate roof deterioration:

  • Recent severe storms (hail, wind, snow loads)
  • Extreme temperature swings
  • High UV exposure
  • Areas prone to ice dams

These factors often tip the scale toward replacement, especially for older roofs.

7. Factor in Modern Benefits

New roofs offer advantages older ones lack:

  • Better insulation reduces energy costs
  • Impact-resistant materials that may lower insurance premiums
  • Improved water resistance and weather protection
  • Longer manufacturer warranties

Making Your Decision: Step-by-Step Process

  1. Start with age: If approaching expected lifespan, lean toward replacement
  2. Assess damage extent: Use the one-third rule
  3. Check for structural issues: These typically require replacement
  4. Calculate costs: Compare repair vs. replacement expenses
  5. Consider timeline: How long will you stay in the home?
  6. Get professional opinions: Consult 2-3 reputable contractors

When to Call a Professional

Schedule a professional assessment when:

  • You’re unsure about the extent
  • You need insurance claim documentation
  • Safety prevents proper self-inspection
  • You want a detailed cost-benefit analysis

Climate-Specific Considerations

In areas with harsh weather like Denver (hail, snow, temperature swings), roofs deteriorate faster. Factor in:

  • Recent storm damage
  • Frequency of severe weather
  • Local building code requirements
  • Insurance considerations for impact-resistant materials

The Bottom Line

Repair when damage is localized, the roof is relatively young, and costs are reasonable compared to replacement.

Replace when the roof is old, damage is widespread, you have structural issues, or you’re spending more than 30% of the replacement cost on repairs.

Remember: your roof protects your home’s value and your family’s safety. While replacement costs more upfront, it often provides better long-term value than repeated repairs on an aging roof.

Next step: Get estimates from licensed contractors for both repair and replacement options. This gives you the concrete numbers needed to make an informed decision based on your specific situation and budget.